Dear Sous Vide Supreme,
I love you dearly. Thank you for coming into my life and making it so much easier. I call you my BFF in the kitchen because cooking steaks (and much more, like bone broth) is a piece of cake with you. I love my sous vide supreme so much that I even took it on our road trip from Arizona to Michigan.
Your raving fan,
Kristen
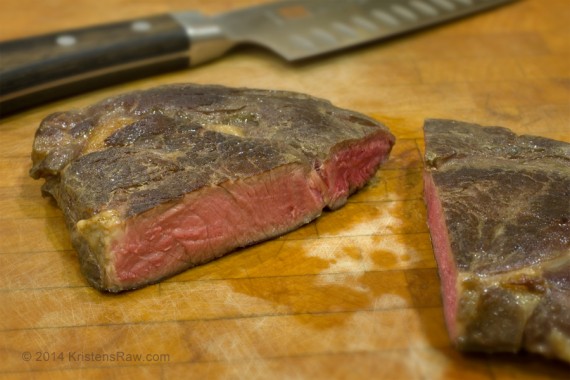
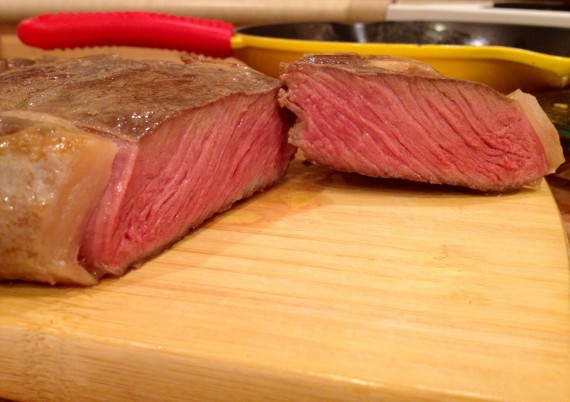
If it isn’t obvious, I love my sous vide supreme kitchen appliance. Thank you to my husband, Greg, for showing me it was an option after I turned too many expensive grass fed steaks into chewing-gum-shoe-leather. Not anymore now that I effortlessly prepare steaks with my sous vide, yielding beautiful steaks with even color and temperature throughout – every time. The best part is that it’s so easy. I don’t need any skills to cook the meat.
The sous vide is also called a water oven, which is similar to a slow cooker but the temperature is tightly controlled and the food is cooked in a vacuum sealed bag. It basically means that you can cook a steak (or any cut of meat, including beef tongue, chicken, turkey, fish and more), perfectly, every time. The meat is cooked through to the exact temperature you want and it will never overcook. I know, magic, right?
Equally important is that using a sous vide allows me to cook much less expensive cuts of grass fed meat to “tenderloin tender” which saves a lot of money. Check out my post on cooking grass fed organic Eye of the Round in my sous vide supreme. See? Save money on the cuts of grass fed meat you buy, and use the money for the sous vide.
The sous vide makes life easy because it means I can put the steak in my sous vide to cook, early in the morning, and not worry about taking it out until I’m ready at lunch or dinner, or heck the next day. This means I don’t have to “time” my steaks to be done by the time my salad or side dishes are prepped either. Timing in the kitchen was never my strong suit. Perfectly cooked meat that can be made ahead of time? Yes!
*Note: You need a food saver or some vacuum seal machine to use with a sous vide.
Steak isn’t the only thing to cook in a sous vide supreme though. I cook the most perfect eggs (omg, this is worth the price of admission alone), organic vegetables, wild caught fish, grass fed organ meats, and any cut of meat really. It bears repeating that a beautiful thing about the sous vide supreme is that I can cook an inexpensive (i.e., usually tough) piece of meat and have it come out mega tender and delicious every time. Oh, I’ve heard burgers can be made in the sous vide as well, but I haven’t experimented with that yet. I will though.
The thing I didn’t realize is that many restaurants are now cooking sous vide because … well … because it’s so useful and awesome.

Next on my wish list is getting the bad-ass chamber sealer to use instead of my Food Saver, but a Food Saver will work for now. The chamber sealer can seal bags of food with liquids, which is not possible with the Food Saver.
A few tips for using a sous vide supreme:
- I fill it with warm water to get it heated to the temperature I want faster.
- Sear the meat after you take it out of the vacuum sealed pouch for a prettier presentation (about 45 to 60 seconds per side in a cast iron skillet on high). Some people pre-sear the meat before putting it in the sous vide, but I haven’t gone that route yet. That being said, searing is optional.
- You can put fresh organic herbs in with your meat, along with a pat of grass fed butter to enhance the flavor. But, keep in mind that sous vide can intensify flavors so go easy on them and experiment.
- Check out ChefSteps for an awesome tutorial.
Here’s how I make the greatest grass fed steaks (ribeyes, filet, and pretty much every cut)
Ingredients:
- Quality grass fed steak(s), one steak per bag
- Salt & Pepper
- Grass fed butter for searing post sous vide, optional
Fill the sous vide supreme with warm tap water.
Turn it on to the desired cooking temp. For my steaks I usually set it at 134 or 135 degrees F.
Get the meat from your refrigerator.
Season the meat with salt and pepper.*
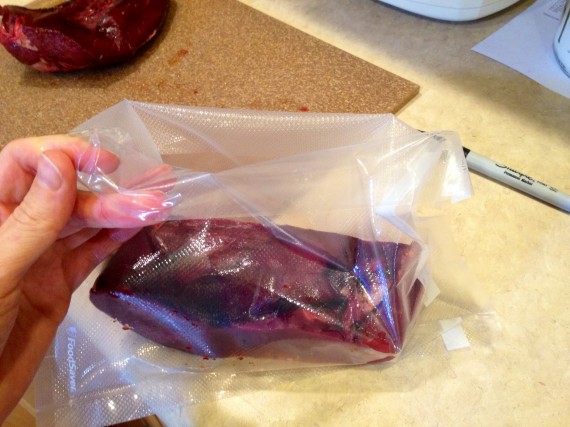
Get FoodSaver bags, and fold the top of each bag over a bit to keep food from touching the part of the bag that needs to be sealed (see pic below). Unfold the bags back to original position after the food is in the bags before sealing.

Use a vacuum seal machine to suck out the air and seal the bags.
Put the sealed steaks into the Sous Vide Supreme and cook for desired time. I usually let my ribeye or new york strip steaks cook 4 to 8 hours.
Take the vacuum sealed bags out of the sous vide after cooking. Cut open and take the meat out (it’ll look kind of grayish and not totally appetizing as we’re used to seeing meat cooked with a “browned” exterior).
Dry the meat with a paper towel.
Get a skillet nice and hot. Toss some grass fed butter in it (or ghee or nothing, if desired… it’s up to you, but I am really enjoying them seared with grass fed butter). Sear both sides of the steak(s), while basting with the butter if you’re getting fancy, for about 45 to 60 seconds per side.
Serve and watch your family go crazy.
*I’ve also seen some chefs not do any seasoning until just before serving, post searing.